What is Yakit for 
It's a WooCommerce plugin that provides the following capabilities for your store :
- Yakit international shipping rates and duties/taxes (fully landed cost) in your WooCommerce shopping cart.
- Ability to pull WooCommerce orders (whether they are quoted by Yakit in your shopping cart or not) into Yakit.
- Access to the Yakit shipping tool to process your shipments.
- Yakit updates the WooCommerce shipped order notification email with the Yakit tracking URL upon shipment dispatch in Yakit.
Now your international customers can buy without fear of having to pay additional fees for duties/taxes at the time of delivery.
Requirements
- WordPress version 3.0 or later
- WooCommerce version 3.0 or later
- Make sure the permalink common settings configured to the below one

Installation steps
- Download and unzip the package from https://wordpress.org/plugins/yakit/
- Upload the Yakit folder to your `/wp-content/plugins/` directory. Note : this is not just the contents of the Yakit folder, but the root folder "Yakit" as well.
- Make sure WooCommerce is active.
- Activate the Yakit plugin via the 'Plugins' menu in WordPress. You will be prompted with the WooCommerce authorization screen. Hit Approve to proceed.
- You will then be taken to the Yakit account signup page. Complete the fields and press the Sign Up button.
- Once you have completed setup of your Yakit.com account, you will be re-directed to your WooCommerce admin dashboard with auto populated Yakit account credentials under
woocommerce API tab /wp-admin/admin.php?page=wc-settings&tab=api§ion=yakit_settings
- You will now configure the Yakit shipping method followed by adding Yakit Shipping to your Shipping Zones.
Configure the Yakit shipping method as follows:
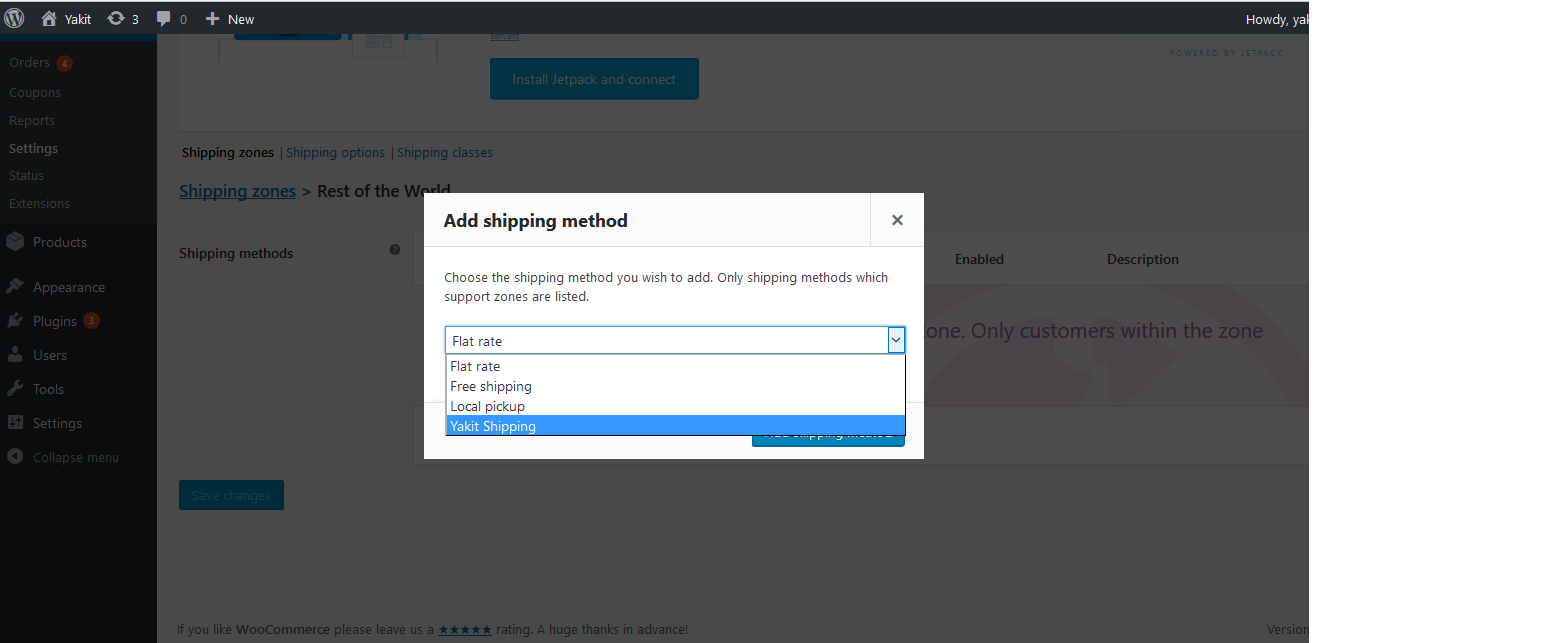
- Select the 'Add shipping method' button, and you will see Yakit as a shipping method. Select Yakit Shipping.
- Now add the Yakit shipping method for each shipping zone
- Go to Dashboard-> WooCommerce-> Shipping-> Shipping Zones /wp-admin/admin.php?page=wc-settings&tab=shipping
- Add or Edit shipping zones.
- You will see Yakit Shipping as a method that you can add to your shipping zone.
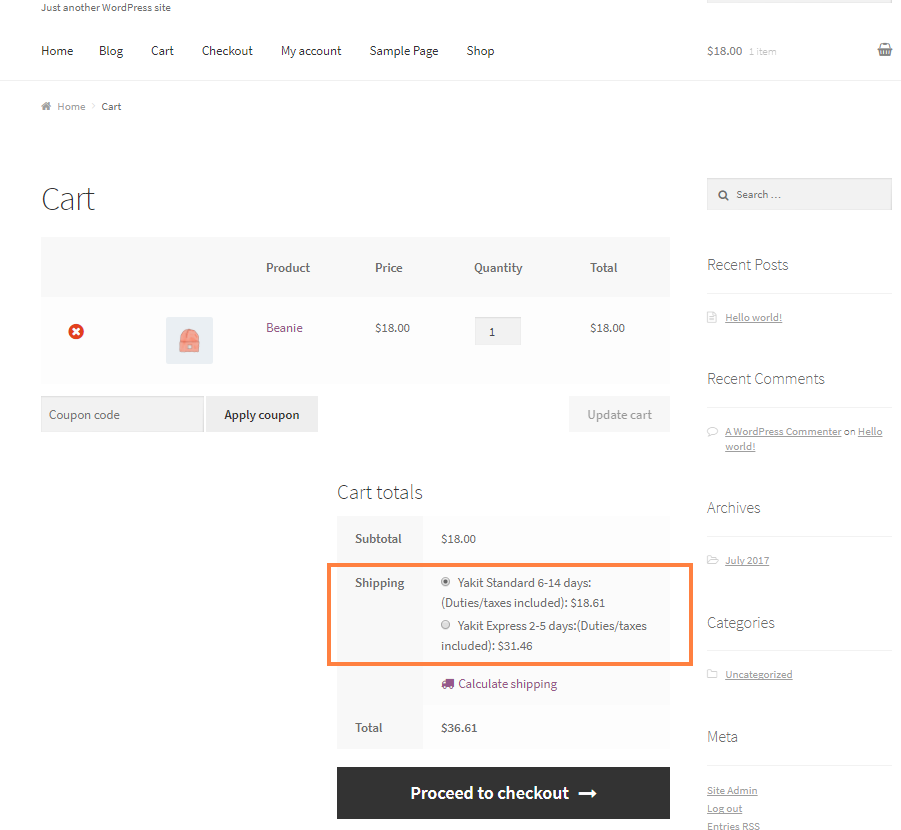
- Your WooCommerce store should now show Yakit shipping (duties and taxes included) in your shopping cart. See below.
- For ease of Yakit dashboard access, click the 'Yakit Shipping Tool' menu under 'Woocommerce'.
- In order for your quotes to be accurate, please make sure that the store's products are populated with the correct weight, dimensions, display names and descriptions, since Yakit depend on this data to provide accurates quotes to your customers. This also helps prevent overages during shipping time.
Happy Merchandising! Leave the shipping to Yakit!
NOTES: Follow these additional steps if Wordpress configured in a sub-folder
- Open the .htaccess file under the sub-folder path '/wp/.htaccess' and make sure the following script is present
# BEGIN WordPressRewriteEngine On
RewriteBase /wp/
RewriteRule ^index\.php$ - [L]
RewriteCond %{REQUEST_FILENAME} !-f
RewriteCond %{REQUEST_FILENAME} !-d
RewriteRule . /wp/index.php [L]# END WordPress
- Ensure that the permalink common setting is configured as follows:
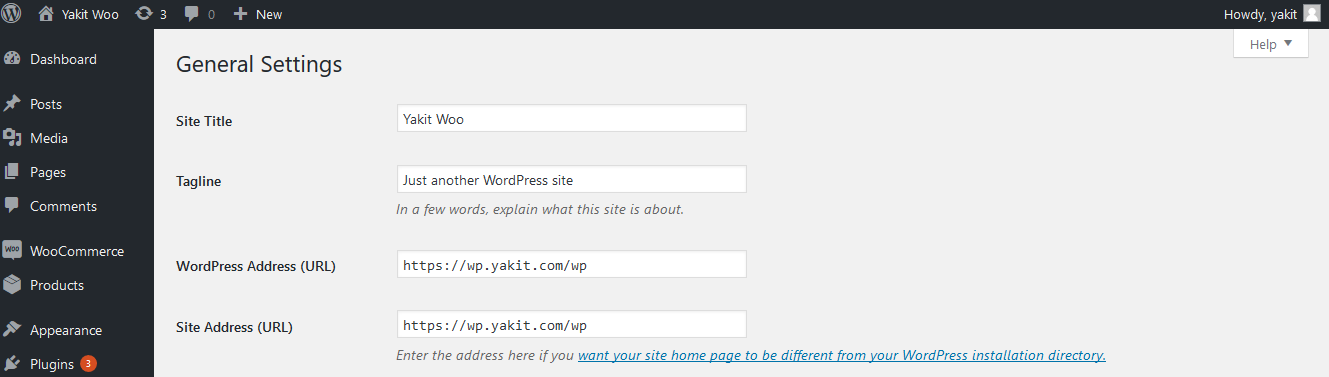
- Make sure the Wordpress general settings as shown below (Log in as admin, Go to Dashboard -> Settings-> General )